14. Lab III: Solution
Solution: Build a Dog Microservice - Registration
Below, we'll walk through each step of the lab and look at one potential way to implement the lab. Even if you get stuck, you should always first try to work through the lab without the solution before coming here, so that you can best learn the related skills and be ready for the project at the end of the course.
Step 1: Turn the microservice into a Eureka client.
- Add the appropriate annotations and dependencies in the Maven POM file.
If you followed Step 0 in the Lab II solution, you already have the necessary dependencies, but if not, you'll want to add both the Eureka discovery client and cloud config.
        <dependency>
            <groupId>org.springframework.cloud</groupId>
            <artifactId>spring-cloud-starter-netflix-eureka-client</artifactId>
        </dependency>
        <dependency>
            <groupId>org.springframework.cloud</groupId>
            <artifactId>spring-cloud-starter-config</artifactId>
        </dependency>
Spring Initializr may have already added the dependency management for you, but if that field does not exist in your POM file, add the following:
    <dependencyManagement>
        <dependencies>
            <dependency>
                <groupId>org.springframework.cloud</groupId>
                <artifactId>spring-cloud-starter-parent</artifactId>
                <version>Greenwich.RELEASE</version>
                <type>pom</type>
                <scope>import</scope>
            </dependency>
        </dependencies>
    </dependencyManagement>
From there, it's just a couple of imports in DogMicroserviceApplication.java (or your similarly named application file) and a single additional annotation.
package com.udacity.DogMicroservice;

import org.springframework.boot.SpringApplication;
import org.springframework.boot.autoconfigure.SpringBootApplication;
import org.springframework.cloud.client.discovery.EnableDiscoveryClient;
import org.springframework.cloud.netflix.eureka.EnableEurekaClient;

@SpringBootApplication
@EnableEurekaClient
public class DogMicroserviceApplication {

    public static void main(String[] args) {
        SpringApplication.run(DogMicroserviceApplication.class, args);
    }

}
Last is adding the necessary lines to application.properties. I decided to add my application dog-service, and set to port 8762. You can choose which port to use here, although I will keep it simple by using the very next port after the one for the Eureka server.
spring.application.name=dog-service
server.port=8762
eureka.client.serviceUrl.defaultZone=http://localhost:8761/eureka/
eureka.client.service-url.default-zone=http://localhost:8761/eureka/
eureka.instance.prefer-ip-address=true
And that's it! Your microservice is now able to be registered with the Eureka server.
Step 2: Ensure your microservice is registered.
- Use a web browser to view the Eureka web console, and check that your microservice is listed.
First, if you stopped or closed it earlier, make sure your Eureka server is running at http://localhost:8761/. Then, go ahead and run the application for your Dog Microservice. You will likely need to refresh the page to see your new dog-service shown as registered with the Eureka server.
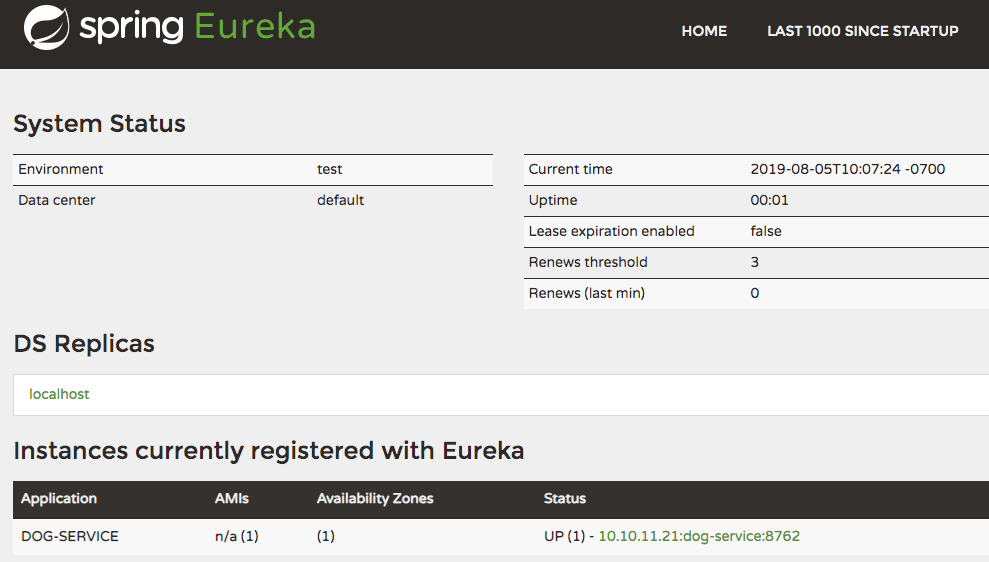
The dog-service is now registered with the Eureka server
You should also be able to see the returned JSON from your Dog microservice at http://localhost:8762/dogs. If you want to go even further, research how to further configure the microservice so you can access it at http://dog-service/dogs instead!
Full Solution
If you'd like the full solution code all in one place, you can download it through the links below.